By The Pavement Group | Updated June 2026 | 9-min read
Apartment complexes that defer sealcoating past the 4-year mark spend, on average, 4–6 times more per square foot on pavement restoration than properties that maintain a consistent 2–3 year sealcoating cycle. That math comes from The Pavement Group’s project history across multifamily properties, and it holds regardless of property size or climate zone.
Most property managers don’t have a sealcoating schedule. They react when the lot looks bad. By the time pavement looks bad, surface oxidation has already compromised the asphalt binder, aggregate is loosening, and crack networks have started forming below the surface layer. The window for inexpensive preventive maintenance has closed.
This guide gives property managers a specific scheduling framework based on traffic volume, climate, and asphalt age, so you can plan proactively, budget accurately, and protect a pavement investment that costs $3–$7 per square foot to replace. To help you justify and allocate expenses, this guide also outlines how to work sealcoating into both your annual and long-term budgeting. By identifying when and how often to plan for sealcoating, you can prevent unexpected costs, communicate future needs to stakeholders, and keep your maintenance spending predictable year over year.
TL;DR:
- Apartment complex parking lots should be sealcoated every 2–3 years under standard conditions
- High-traffic properties (200+ units) or Sun Belt locations may need annual or 18-month cycles
- New asphalt requires a 90-day cure before the first sealcoat, and that first application is the most protective
- Sealcoating costs $0.14–$0.25 per sq ft versus $3–$7 per sq ft for full asphalt replacement
- Signs you’ve already waited too long: gray or faded surface, surface cracking, visible aggregate loss
The Standard Sealcoating Frequency for Apartment Complex Parking Lots
The industry standard for commercial and multifamily parking lots is sealcoating every 2–3 years. That baseline comes from the rate at which asphalt oxidizes under normal traffic and UV exposure conditions. The sealcoat layer degrades at roughly 20–30% per year under average conditions, meaning a fresh application provides effective protection for 3–4 years before it needs renewal.
For apartment complexes specifically, the 2–3 year interval is the floor, not the ceiling. Multifamily properties generate traffic patterns that are fundamentally different from light commercial lots. Residents come and go multiple times daily, delivery vehicles and service trucks add weight stress that passenger vehicles don’t, and the lot never fully empties the way an office parking lot does overnight.
Why “every 2–3 years” is the baseline, and what moves it
The 2–3 year standard assumes moderate traffic (under 100 units), a temperate climate with moderate UV exposure, asphalt in reasonable condition, and adequate drainage. Change any of those variables and the interval compresses. A 300-unit complex in Phoenix with drainage issues and 10-year-old asphalt needs annual sealcoating, not triennial.
The variables that tighten the schedule are covered in detail in the next section. The important principle is this: treat 2–3 years as the maximum interval for a healthy, well-maintained lot, not as a target you try to stretch.
New asphalt: the 90-day cure rule and why first sealcoat timing matters most
New asphalt contains oils that need time to evaporate before a sealcoat will bond properly. The industry standard cure period is 90 days minimum; some contractors recommend waiting 6–12 months for the full cure in hot climates where the asphalt remains pliable longer.
Applying sealcoat too early traps those oils, preventing proper cure and causing the sealcoat to peel. Waiting too long, past 12 months on new asphalt, allows the binder to begin oxidizing before the first protection layer is applied. The first sealcoat is the most critical application in a pavement’s life. Get the timing right, and you extend the pavement’s effective life by years. Get it wrong, and you accelerate the degradation you were trying to prevent.
5 Factors That Determine Your Property’s Sealcoating Schedule
No two apartment complex parking lots wear at the same rate. The right sealcoating interval for your property depends on five compounding variables.
Factor 1: Traffic volume and vehicle type
Traffic volume is the single biggest accelerator of pavement wear. A 50-unit complex generates roughly 200–400 vehicle trips per day. A 300-unit complex generates 1,200–2,400 trips. Beyond raw count, vehicle type matters: delivery trucks, moving vans, garbage trucks, and HVAC service vehicles impose axle loads 4–8 times higher than passenger cars, concentrating stress at entry aprons, dumpster pads, and drive lanes.
Properties with more than 150 units or regular heavy-vehicle traffic should plan for an 18-month to 2-year sealcoating cycle, not the standard 3-year interval.
Factor 2: Climate zone and UV exposure
UV radiation oxidizes the asphalt binder, breaking it down. In high-UV climates, the Sun Belt states, including Texas, Arizona, Florida, Georgia, and the Carolinas, experience measurable asphalt oxidation faster than in northern or coastal climates. According to the Asphalt Institute’s pavement maintenance guidelines, pavement in high-UV southern climates can lose binder flexibility 30–40% faster than equivalent pavement in northern states under the same traffic load.
Sun Belt apartment complexes should budget for annual sealcoating inspections with a maximum interval of 2 years, regardless of traffic volume.
Freeze-thaw cycles in northern climates create a different but equally damaging stress pattern: water infiltrates small surface cracks, freezes, expands, and widens those cracks significantly over a single winter season. Northern properties benefit from sealcoating in late summer or early fall, before the freeze cycle begins, to seal any surface vulnerabilities from the summer season.
Factor 3: Asphalt age and existing condition
Older asphalt has less residual binder flexibility. A lot that is 15 years old and has been maintained consistently responds well to sealcoating. A lot that is 10 years old and has been neglected for 6 years may be past the point where sealcoating alone is sufficient; it may need crack sealing or spot patching first.
The sealcoating condition threshold is a Pavement Condition Index (PCI) of 50 or higher on the ASTM D6433 scale. Below PCI 50, structural repairs take priority over surface sealing.
Factor 4: Drainage quality and standing water exposure
Standing water is asphalt’s most destructive enemy. Water that pools on the surface can work into microcracks through freeze-thaw or simple hydrostatic pressure, widening them and softening the subbase beneath. A lot with drainage problems deteriorates at 2–3 times the rate of a lot with proper slope and drainage infrastructure.
Before sealcoating any lot with known drainage issues, address the drainage problem. Sealcoating over a lot that pools water seals the water-infiltration pathways and traps moisture in the subbase, the opposite of the intended result.
Factor 5: Previous maintenance history
A lot with a consistent sealcoating history has preserved binder flexibility and resists cracking better than an identical lot that was neglected. Documented maintenance history also matters for property insurance purposes and potential liability claims related to trip hazards or vehicle damage.
If you are taking over management of a property with no maintenance records, treat the lot as if it is at the outer edge of its sealcoating interval and get a professional assessment immediately. To avoid this challenge in the future, start a digital maintenance log from day one. Use a simple spreadsheet, cloud-based property management software, or dedicated maintenance apps to track dates of inspections, services performed, and contractor details. Templates pre-set for recurring tasks (such as annual inspections or 2-year sealcoating reminders) will help you maintain compliance and make long-term planning much easier. Keeping dated photos and digital copies of invoices in a shared folder further streamlines your documentation for future managers and budgeting needs.
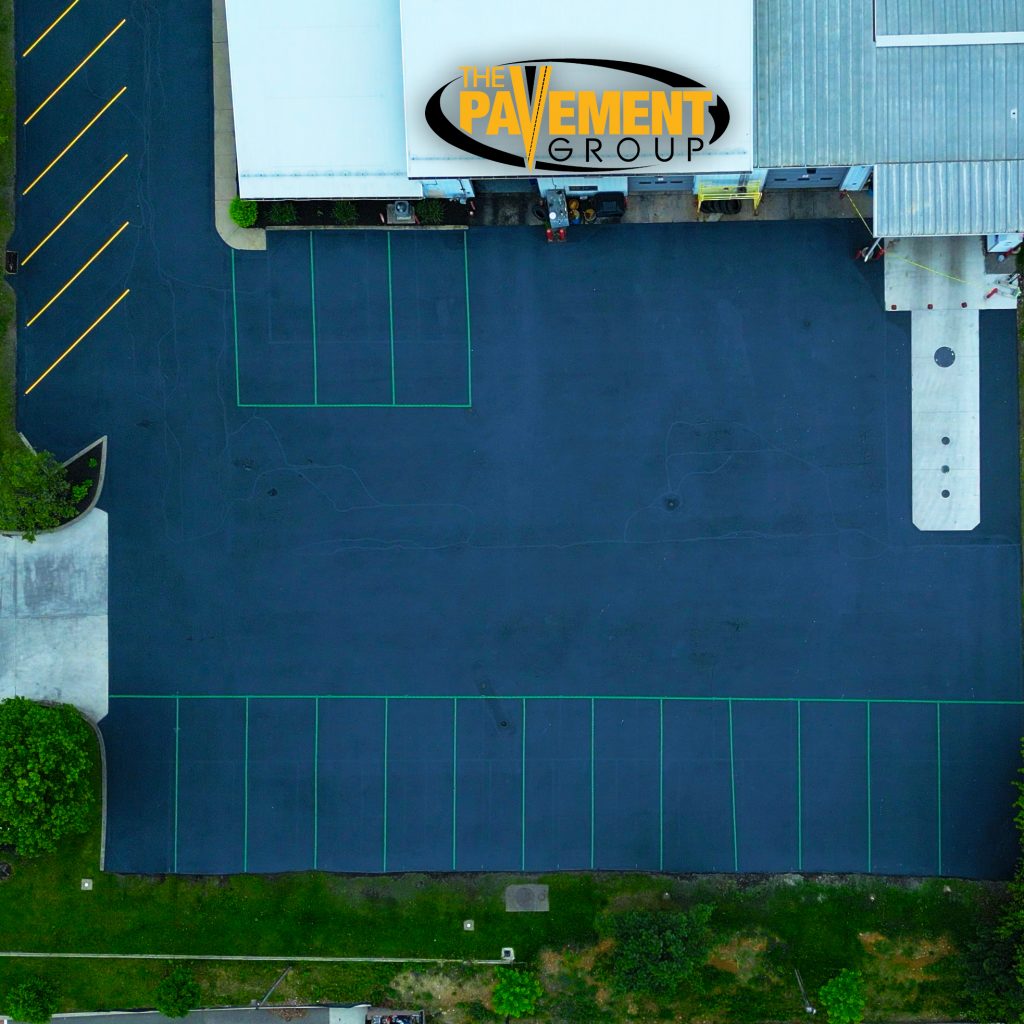
Sealcoating Frequency by Property Profile
| Property Type | Traffic Level | Climate | Asphalt Age | Recommended Interval |
|---|---|---|---|---|
| Small complex (under 75 units) | Low | Temperate | Under 10 years | Every 3 years |
| Mid-size complex (75–150 units) | Moderate | Temperate | Under 10 years | Every 2–3 years |
| Large complex (150–300 units) | High | Any | Any | Every 2 years |
| Any complex | Any | Sun Belt (high UV) | Any | Every 1.5–2 years |
| Any complex | Any | Northern (freeze-thaw) | Any | Every 2–3 years (fall application) |
| Any complex | Any | Any | Over 12 years | Annual inspection, 2-year max interval |
| New construction | N/A | Any | 0–1 year | First coat at 90 days–12 months post-install |
What Happens If You Skip Sealcoating: The Real Cost of Deferred Maintenance
Skipping sealcoating does not save money. It defers a small cost and creates a larger one.
The oxidation and UV degradation timeline
Asphalt starts oxidizing the day it is laid. The binder, the petroleum-based compound that holds the aggregate together and gives asphalt its flexibility, begins losing volatiles through evaporation and UV exposure immediately. A fresh sealcoat slows this process by 70–80% by reflecting UV radiation and sealing the surface against oxygen infiltration.
Without a sealcoat, the binder reaches its brittleness threshold in 4–6 years in moderate climates and as few as 2–3 years in high-UV Sun Belt environments. Once the binder is brittle, the asphalt cracks under thermal expansion and contraction that it used to handle flexibly.
From surface fading to structural failure: the 4-stage deterioration model
Asphalt deterioration follows a consistent progression:
Stage 1 (Years 1–3, unsealed): Surface oxidation. The lot fades from black to gray. The binder is losing flexibility, but the surface is structurally intact. Sealcoating at this stage is maximally effective and low-cost.
Stage 2 (Years 3–5, unsealed): Surface cracking. Hairline cracks appear. Water begins entering the pavement structure. Sealcoating can still help, but crack sealing is now required first. The cost per square foot doubles compared to the Stage 1 intervention.
Stage 3 (Years 5–8, unsealed): Structural cracking. Cracks widen and connect into alligator patterns. Aggregate raveling begins at crack edges. The subbase is being compromised. Sealcoating alone is no longer sufficient; patching and, potentially, a localized overlay are required.
Stage 4 (Years 8+, unsealed): Failure. Potholes form. The subbase is compromised. Full overlay or replacement is the only viable option. The cost per square foot is 10–20 times that of a Stage 1 sealcoating intervention.
Sealcoating cost vs. overlay vs. full repave: the ROI math
The cost comparison is not close:
- Sealcoating: $0.14–$0.25 per square foot
- Crack sealing (add-on): $0.35–$0.65 per linear foot
- Asphalt overlay (1.5–2 inch): $1.50–$3.50 per square foot
- Full replacement: $3.00–$7.00 per square foot
A 30,000 sq ft apartment complex parking lot, typical for a 150-unit property, costs $4,200–$7,500 to sealcoat every 2 years. That same lot costs $90,000–$210,000 to fully replace. The Pavement Group’s project data show that properties that maintain a consistent sealcoating schedule extend pavement life to 25–30 years. Properties that defer sealcoating past the 4-year mark consistently require overlay or replacement in 12–15 years.
Not sure where your parking lot is on the deterioration timeline?
Call The Pavement Group at (833) 614-1345 for a no-obligation pavement assessment. We serve multifamily properties across [service region].
How to Read Your Parking Lot: 6 Signs It’s Time to Sealcoat Now
You do not need a pavement engineer to identify the warning signs. These six indicators are visible from a walkthrough of the property.
Visual indicators: color, texture, surface aggregate
1. Gray or faded surface color. Fresh or recently sealed asphalt is deep black. Gray or brown-toned asphalt has lost binder protection, and UV oxidation is underway. This is the earliest and most correctable warning sign.
2. Rough or porous surface texture. Run your hand across the surface. Sealed, healthy asphalt feels smooth and slightly tacky in warm weather. A rough, sandy, or granular texture indicates binder loss and aggregate exposure.
3. Visible aggregate (gravel) on the surface. Loose aggregate appearing on the pavement surface or collecting at lot edges means the binder holding those stones in place has degraded significantly. This stage precedes pothole formation.
Structural indicators: cracking patterns, edge deterioration
4. Hairline or longitudinal cracking. Fine cracks running parallel to traffic flow or across the surface indicate thermal stress that the binder can no longer absorb. At this stage, crack seal first, then seal coat.
5. Alligator or fatigue cracking. Interconnected crack patterns resembling alligator skin indicate structural failure in the pavement base or subbase. Sealcoating will not fix this. Base repair or overlay is required.
6. Edge raveling or crumbling. Crumbling at the pavement edges, where water drains and freeze-thaw stress concentrates, is an early structural indicator. Address edge cracking before it progresses toward the center of the lot.
The Best Time of Year to Sealcoat an Apartment Complex Parking Lot
Sealcoat application is temperature-sensitive. Applied outside the right conditions, it will not cure properly, will cure too slowly to protect against rain, or will develop adhesion failures.
Temperature and humidity requirements for sealcoat adhesion
The standard application requirements for coal tar and asphalt emulsion sealcoats, per manufacturer specifications and the Pavement Coatings Technology Council, are:
- Air temperature: 50°F minimum and rising at the time of application
- Surface temperature: 55°F minimum
- Humidity: Below 90%
- Rain-free window: 24–48 hours after application for full cure
- No application in direct sunlight above 90°F; the sealcoat surface cures too quickly, trapping moisture beneath
This places the ideal application window in late spring through early fall for most U.S. climates.
Scheduling around resident traffic, minimizing disruption
Apartment complex sealcoating requires coordinating around residents in a way that commercial lots do not. Best practices for minimizing disruption:
- Notify residents 5–7 days in advance with specific lot-closure times
- Sealcoat in phases, half the lot at a time, to maintain some parking availability
- Schedule applications for weekday mornings when fewest residents are home
- Post physical signage at lot entrances 48 hours before work begins
- Plan a 24-hour minimum closure per section; 48 hours in cooler temperatures
Regional timing: Sun Belt vs. northern climate considerations
Sun Belt properties (TX, AZ, FL, GA, SC, NC): The application window runs from March through November. Avoid peak summer midday application above 90°F. Morning applications in summer (start by 7:00 AM) allow the sealcoat to cure before afternoon heat peaks.
Northern properties (Midwest, Northeast, Mountain West): The application window is May through September. Fall applications (September) are particularly valuable, sealing any summer surface wear before freeze-thaw cycles begin. Do not apply sealcoat if ground frost is possible within 24 hours.
Sealcoating vs. Crack Sealing vs. Full Repaving: What Your Lot Actually Needs
Not every pavement problem calls for sealcoating. Using the wrong treatment wastes money and can accelerate deterioration.
When sealcoating is the right call
Sealcoating is the right treatment when the pavement is structurally sound, PCI is above 50, there is no alligator cracking, there is no base failure, and the surface shows oxidation, minor surface cracking, or simply needs UV and water protection as part of a scheduled maintenance program. If the surface cracks are hairline or surface-level only, seal them first, then apply sealcoat.
When crack sealing must come first
Any crack wider than 1/4 inch must be sealed before sealcoating. Applying sealcoat over open cracks seals water and debris into the crack channel, accelerating the deterioration that the crack sealing would have stopped. Crack sealing is an add-on that costs $0.35–$0.65 per linear foot and significantly extends the life of the subsequent sealcoat application.
When the lot is past sealcoating and needs overlay or replacement
Sealcoating is a surface treatment. It does not add structural strength. If your lot has alligator cracking, base failure, or PCI below 40, sealcoating is not the right first step. An asphalt overlay (1.5–2-inch new surface over the existing base) or full replacement is required. Attempting to sealcoat a structurally compromised lot delays proper repair and gives a false sense of protection.
Treatment Comparison
| Treatment | Best For | Cost per Sq Ft | Lifespan Added | Disruption Level |
|---|---|---|---|---|
| Sealcoating | Preventive maintenance, surface protection | $0.14–$0.25 | 3–5 years | 24–48 hours |
| Crack sealing | Isolated cracks (before sealcoat) | $0.35–$0.65/linear ft | 2–5 years | Minimal |
| Asphalt overlay | Structurally compromised surface | $1.50–$3.50 | 8–15 years | 2–5 days |
| Full replacement | Base/subbase failure | $3.00–$7.00 | 20–30 years | 5–10 days |
How Much Does Sealcoating an Apartment Complex Parking Lot Cost?
Sealcoating is priced per square foot, with the total cost driven by lot size, surface condition, product type, and regional labor rates.
Cost per square foot by scope and product type
- Standard asphalt emulsion sealcoat: $0.14–$0.20 per sq ft
- Coal tar emulsion sealcoat (where permitted): $0.18–$0.25 per sq ft
- Crack sealing (add-on): $0.35–$0.65 per linear foot of crack
- Line striping (re-stripe after sealing): $0.10–$0.20 per sq ft additional
Prices are consistent with HomeAdvisor’s 2025 sealcoating cost data and The Pavement Group’s current commercial pricing.
Total cost examples by property size
| Property Size | Approx. Lot Area | Sealcoating Cost (Standard) | With Crack Sealing | With Striping |
|---|---|---|---|---|
| 50-unit complex | ~10,000 sq ft | $1,400–$2,000 | $2,000–$3,000 | $2,400–$3,400 |
| 150-unit complex | ~30,000 sq ft | $4,200–$6,000 | $5,500–$8,000 | $6,500–$9,500 |
| 300-unit complex | ~60,000 sq ft | $8,400–$12,000 | $10,500–$15,500 | $12,500–$18,000 |
How to budget sealcoating into your annual property maintenance plan
Commercial property managers should line-item sealcoating as a recurring capital expense, not a reactive repair budget item. A simple planning framework:
- Annual: Conduct a visual inspection. Document surface color, cracking, and any drainage issues. Take dated photos.
- Every 2–3 years: Budget for full sealcoating application. Get contractor bids 6 months in advance to secure schedule slots.
- Every 5–7 years: Budget for crack sealing plus sealcoating. Assess whether any sections need patching or overlay.
- Every 15–25 years: Budget for overlay or full replacement depending on condition.
Get a project-specific cost estimate for your apartment complex. Contact The Pavement Group →
Building a Pavement Maintenance Schedule for Your Apartment Complex
A written pavement maintenance schedule transforms reactive spending into predictable capital planning. Here is a framework built for multifamily properties.
Year 0: New asphalt baseline documentation
When new asphalt is installed, document the installation date, contractor, asphalt mix specification, square footage, and photos of the finished surface. This baseline record serves as your reference for all future condition assessments. Schedule first sealcoat for 90 days post-install (warm climates) or the following spring (cool climates).
Years 1–3: First sealcoat cycle
Apply the first sealcoat at the 90-day to 12-month mark. Apply a second sealcoat at the 2–3-year mark, depending on traffic and climate factors. At each application, document the date, contractor, product used, and post-application photos. This record protects you from any liability claim related to pavement condition.
Years 4–10: Maintenance rhythm and inspection triggers
Maintain a 2–3-year sealcoating cycle. Add crack sealing to any application where surface cracks exceed 1/4 inch in width. Conduct annual walkthroughs before winter (in northern climates) and before the summer peak (in Sun Belt climates). Add a professional pavement assessment at the 7–8 year mark to evaluate whether overlay planning should begin.
Years 10+: Overlay and replacement planning
At 10–12 years, commission a formal Pavement Condition Index assessment from a certified pavement inspector. Properties above PCI 55 can continue sealcoating; PCI 40–55 should plan for overlay within 2–3 years. Properties below PCI 40 require replacement planning. Begin budgeting and contractor engagement 18–24 months before the projected overlay or replacement date.
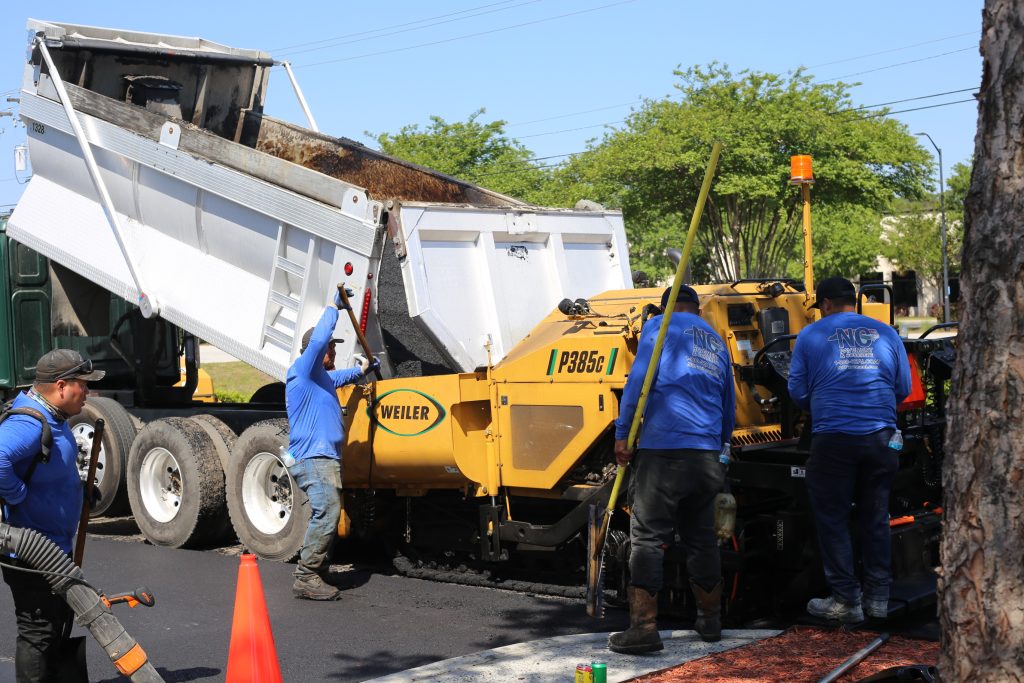
What to Expect During a Commercial Sealcoating Job
Understanding the process helps property managers set expectations with residents and coordinate the job effectively.
Surface prep and crack filling
Before any sealcoat is applied, the surface must be cleaned of oil stains, debris, and vegetation. Oil spots require a primer application. Sealcoat does not bond to petroleum-contaminated surfaces. Cracks wider than 1/4 inch are filled with hot-pour crack filler and allowed to cure before sealcoat application begins. Surface prep typically takes 1–2 hours for lots under 20,000 sq ft.
Application method: spray vs. squeegee
Commercial parking lots are typically sealed using a spray system, which applies a more uniform coat at a higher speed than squeegee application. Squeegee application is used for smaller areas, around obstacles, and along edges. A quality commercial job applies two coats; the first coat seals surface porosity, and the second coat provides the protective UV barrier. Single-coat jobs are common among low-bid contractors and reduce the effective protection life by 30–40%.
Cure time and reopening, planning for resident communication
Standard cure time is 24–48 hours, depending on temperature and humidity. Cooler temperatures (below 65°F) extend cure time. Do not allow vehicle traffic until the surface is fully cured. Premature traffic can leave tire marks and displace the sealcoat before it has bonded. Communicate reopening times to residents in writing with a buffer: if the contractor says 24 hours, tell residents 36 hours.
Ready to schedule your apartment complex sealcoating?
The Pavement Group is a commercial sealcoating contractor serving multifamily properties across [service region]. Authorized dealer. Fully insured. Two-coat commercial standard on every job. See our commercial sealcoating services →
Frequently Asked Questions
How often should apartment complex parking lots be sealcoated?
Apartment complex parking lots should be sealcoated every 2–3 years under standard conditions. High-traffic properties with 150+ units, Sun Belt climate locations, or lots with drainage issues should target an 18-month to 2-year interval. New asphalt requires a 90-day cure before the first application.
How long does parking lot sealcoating last?
A properly applied two-coat commercial sealcoat lasts 3–5 years under moderate traffic and UV exposure. High-traffic lots or properties in high-UV southern climates typically have an effective protection life of 2–3 years. Sealcoat applied in a single coat or over inadequately prepped surfaces may fail in under 2 years.
What is the best time of year to sealcoat an apartment complex parking lot?
Late spring through early fall is the standard window, with air temperature above 50°F, surface temperature above 55°F, humidity below 90%, and a 24–48 hour rain-free forecast. Northern properties benefit from fall applications to seal summer wear before freeze-thaw cycles begin. Sun Belt properties should avoid peak midday heat above 90°F.
How much does it cost to sealcoat an apartment complex parking lot?
Standard asphalt emulsion sealcoating runs $0.14–$0.25 per square foot. A typical 150-unit complex with roughly 30,000 square feet of pavement costs $4,200–$7,500 to sealcoat, plus $1,000–$2,500 for crack sealing if needed. Re-striping adds $3,000–$6,000. Get at least three contractor bids for accurate project pricing.
What happens if you don’t sealcoat asphalt?
Unsealed asphalt oxidizes and loses binder flexibility within 3–5 years in temperate climates and 2–3 years in high-UV environments. The result is surface cracking, aggregate loss, and eventual structural failure. Properties that defer sealcoating past year 4 consistently spend 4–6 times more per square foot on restoration than properties with a consistent maintenance schedule.
How do you know when a parking lot needs sealcoating?
Six indicators: gray or faded surface color, rough or porous texture, visible aggregate on the surface, hairline surface cracking, edge raveling, and visible water ponding in micro-depressions. Any two of these indicators together mean sealcoating is overdue. Alligator cracking means the lot is past sealcoating and needs structural repair.
Can you sealcoat over cracked asphalt?
Surface-level cracks under 1/4 inch wide can be sealcoated over. Cracks wider than 1/4 inch require hot-pour crack filling before sealcoat application. Alligator or structural cracking indicates base failure; sealcoating over structural damage traps moisture and accelerates deterioration rather than preventing it. Assess crack type before scheduling the application.
How long after sealcoating can cars drive on the parking lot?
The standard cure window is 24–48 hours, depending on temperature and humidity. Temperatures below 65°F or humidity above 70% extend cure time toward the 48-hour end. Premature traffic before full cure leaves permanent tire impressions and reduces the sealcoat’s protective bond. Communicate 36–48 hours in advance to residents as a conservative buffer.
See also: Asphalt vs. Concrete Parking Lots for Apartment Complexes: Which is the Better Investment? | ADA Compliance for Apartment Parking Lots: The Multifamily Operator Annual Audit Checklist